Reseed hosts are crucial infrastructure for the I2P network, providing new routers with an initial group of nodes during the bootstrap process. This guide will walk you through setting up and running your own reseed server.
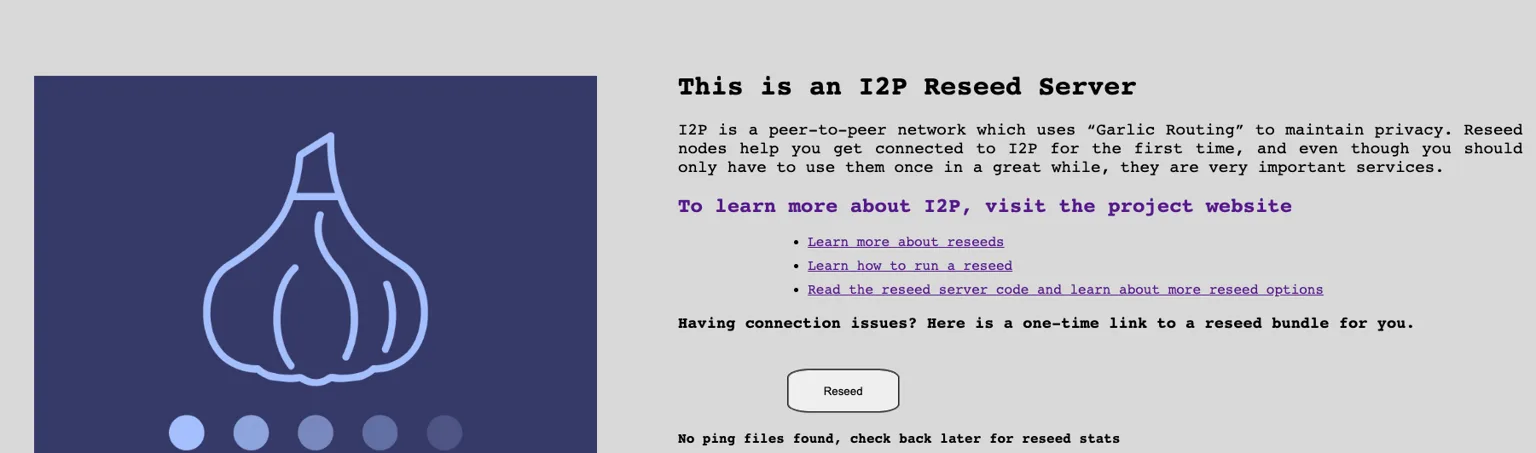
What is an I2P Reseed Server?
An I2P reseed server helps integrate new routers into the I2P network by:
- Providing initial peer discovery: New routers receive a starting set of network nodes to connect to
- Bootstrap recovery: Helping routers that are struggling to maintain connections
- Secure distribution: The reseeding process is encrypted and digitally signed to ensure network security
When a new I2P router starts for the first time (or has lost all its peer connections), it contacts reseed servers to download an initial set of router information. This allows the new router to begin building its own network database and establishing tunnels.
Prerequisites
Before beginning, you’ll need:
- A Linux server (Debian/Ubuntu recommended) with root access
- A domain name pointing to your server
- At least 1GB RAM and 10GB disk space
- A running I2P router on the server to populate the network database
- Basic familiarity with Linux system administration
Preparing the Server
Step 1: Update System and Install Dependencies
First, update your system and install the required packages:
sudo apt update && sudo apt upgrade -y && sudo apt-get install golang-go git make docker.io docker-compose -y
This installs:
- golang-go: Go programming language runtime
- git: Version control system
- make: Build automation tool
- docker.io & docker-compose: Container platform for running Nginx Proxy Manager
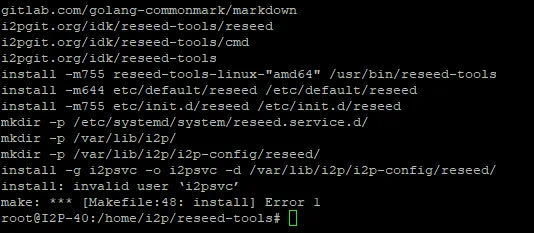
Step 2: Clone and Build Reseed Tools
Clone the reseed-tools repository and build the application:
cd /home/i2p
git clone https://i2pgit.org/idk/reseed-tools
cd reseed-tools
make build
sudo make install
The reseed-tools package provides the core functionality for running a reseed server. It handles:
- Collecting router information from your local network database
- Packaging router info into signed SU3 files
- Serving these files over HTTPS

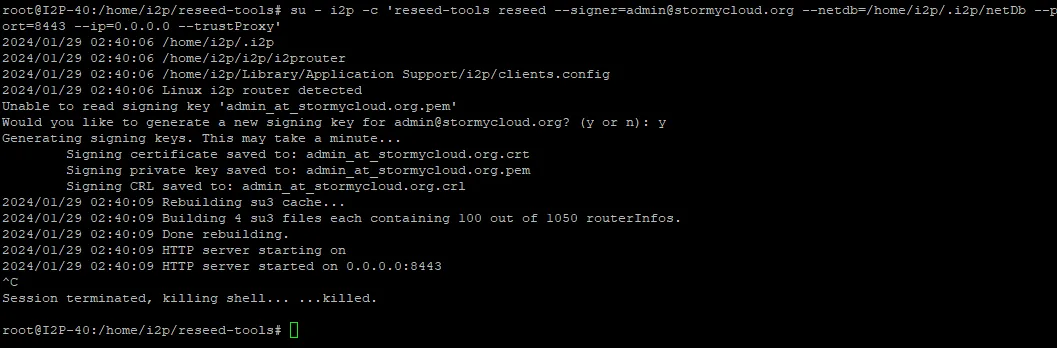
Step 3: Generate SSL Certificate
Generate your reseed server’s SSL certificate and private key:
su - i2p -c 'reseed-tools reseed --signer=admin@stormycloud.org --netdb=/home/i2p/.i2p/netDb --port=8443 --ip=127.0.0.1 --trustProxy'
Important parameters:
--signer: Your email address (replaceadmin@stormycloud.orgwith your own)--netdb: Path to your I2P router’s network database--port: Internal port (8443 is recommended)--ip: Bind to localhost (we’ll use a reverse proxy for public access)--trustProxy: Trust X-Forwarded-For headers from the reverse proxy
The command will generate:
- A private key for signing SU3 files
- An SSL certificate for secure HTTPS connections
Step 4: Backup Your Keys
Critical: Securely backup the generated keys located in /home/i2p/.reseed/:
sudo tar -czf reseed-keys-backup.tar.gz /home/i2p/.reseed/
Store this backup in a secure, encrypted location with limited access. These keys are essential for your reseed server’s operation and should be protected carefully.
Configuring the Service
Step 5: Create Systemd Service
Create a systemd service to run the reseed server automatically:
sudo tee /etc/systemd/system/reseed.service <<EOF
[Unit]
Description=Reseed Service
After=network.target

[Service]
User=i2p
WorkingDirectory=/home/i2p
ExecStart=/bin/bash -c 'reseed-tools reseed --signer=admin@stormycloud.org --netdb=/home/i2p/.i2p/netDb --port=8443 --ip=127.0.0.1 --trustProxy'
Restart=always
RestartSec=10

[Install]
WantedBy=multi-user.target
EOF
Remember to replace admin@stormycloud.org with your own email address.
Now enable and start the service:
sudo systemctl daemon-reload
sudo systemctl enable reseed
sudo systemctl start reseed
Check that the service is running:
sudo systemctl status reseed

Step 6: Optional - Configure Periodic Restarts
For optimal performance, you may want to restart the reseed service periodically to refresh the router information:
sudo crontab -e
Add this line to restart the service every 3 hours:
0 */3 * * * systemctl restart reseed
Setting Up Reverse Proxy
The reseed server runs on localhost:8443 and needs a reverse proxy to handle public HTTPS traffic. We recommend Nginx Proxy Manager for its ease of use.
Install Nginx Proxy Manager
Deploy Nginx Proxy Manager using Docker:
docker run -d \
--name nginx-proxy-manager \
-p 80:80 \
-p 81:81 \
-p 443:443 \
-v $(pwd)/data:/data \
-v $(pwd)/letsencrypt:/etc/letsencrypt \
--restart unless-stopped \
jc21/nginx-proxy-manager:latest
This exposes:
- Port 80: HTTP traffic
- Port 81: Admin interface
- Port 443: HTTPS traffic
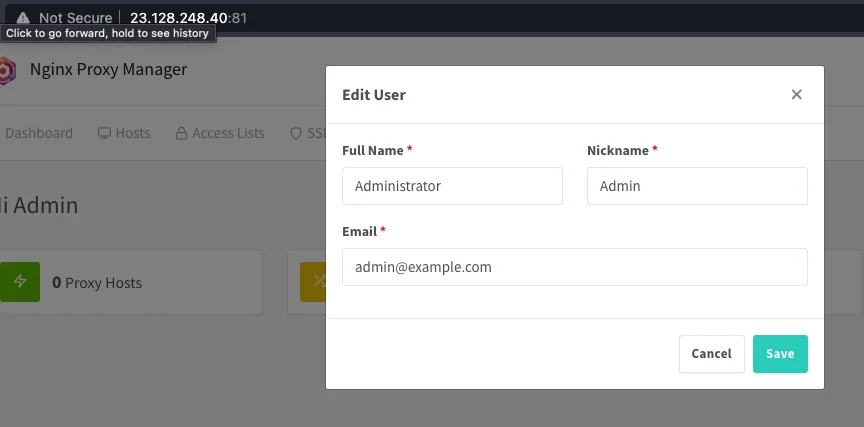
Configure Proxy Manager
Access the admin interface at
http://your-server-ip:81Login with default credentials:
- Email: admin@example.com
- Password: changeme
Important: Change these credentials immediately after first login!
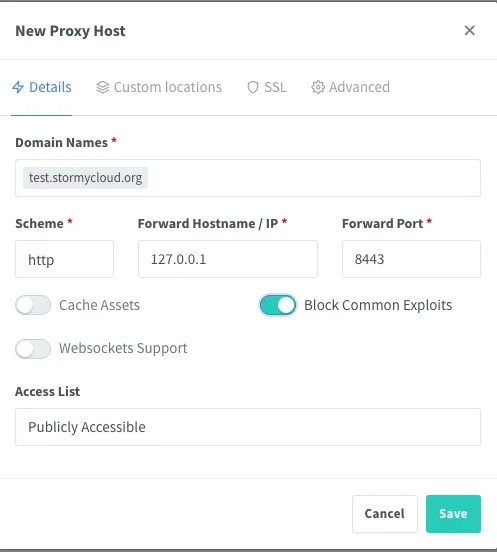
- Navigate to Proxy Hosts and click Add Proxy Host
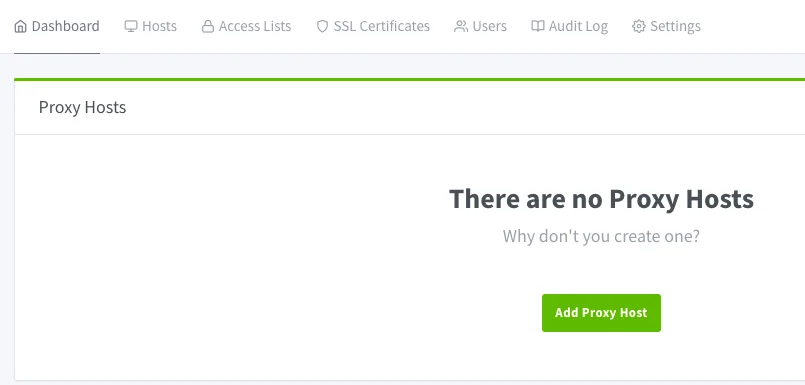
- Configure the proxy host:
- Domain Name: Your reseed domain (e.g.,
reseed.example.com) - Scheme:
https - Forward Hostname / IP:
127.0.0.1 - Forward Port:
8443 - Enable Cache Assets
- Enable Block Common Exploits
- Enable Websockets Support
- Domain Name: Your reseed domain (e.g.,
- In the SSL tab:
- Select Request a new SSL Certificate (Let’s Encrypt)
- Enable Force SSL
- Enable HTTP/2 Support
- Agree to Let’s Encrypt Terms of Service
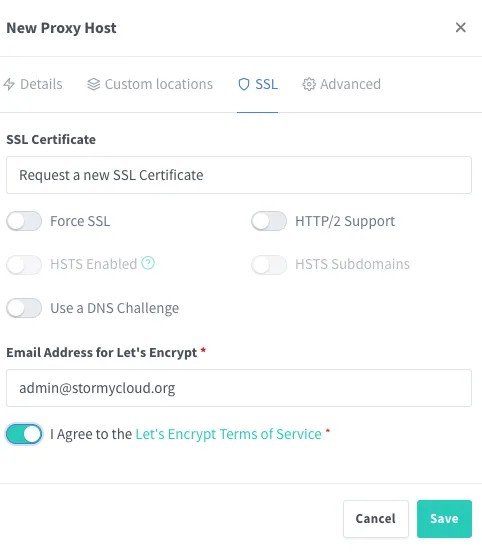
- Click Save
Your reseed server should now be accessible at https://reseed.example.com
Registering Your Reseed Server
Once your reseed server is operational, contact the I2P developers to have it added to the official reseed server list.
Contact Information
Email zzz (I2P lead developer) with the following information:
- I2P Email: zzz@mail.i2p
- Clearnet Email: zzz@i2pmail.org
Required Information
Include in your email:
- Reseed server URL: The full HTTPS URL (e.g.,
https://reseed.example.com) - Public reseed certificate: Located at
/home/i2p/.reseed/(attach the.crtfile) - Contact email: Your preferred contact method for server maintenance notifications
- Server location: Optional but helpful (country/region)
- Expected uptime: Your commitment to maintaining the server
Verification
The I2P developers will verify your reseed server is:
- Properly configured and serving router information
- Using valid SSL certificates
- Providing correctly signed SU3 files
- Accessible and responsive
Once approved, your reseed server will be added to the list distributed with I2P routers, helping new users join the network!
Monitoring and Maintenance
Check Service Status
Monitor your reseed service:
sudo systemctl status reseed
sudo journalctl -u reseed -f
Monitor Resource Usage
Keep an eye on system resources:
htop
df -h
Update Reseed Tools
Periodically update the reseed-tools to get the latest improvements:
cd /home/i2p/reseed-tools
git pull
make build
sudo make install
sudo systemctl restart reseed
Certificate Renewal
If using Let’s Encrypt through Nginx Proxy Manager, certificates will auto-renew. Verify renewal is working:
docker logs nginx-proxy-manager | grep -i certificate
Troubleshooting
Service Won’t Start
Check logs for errors:
sudo journalctl -u reseed -n 50
Common issues:
- I2P router not running or network database empty
- Port 8443 already in use
- Permission issues with
/home/i2p/.reseed/directory
No Router Info Being Served
Ensure your I2P router is running and has populated its network database:
ls -lh /home/i2p/.i2p/netDb/
You should see many .dat files. If empty, wait for your I2P router to discover peers.
SSL Certificate Errors
Verify your certificates are valid:
openssl s_client -connect reseed.example.com:443 -servername reseed.example.com
Can’t Access via Domain
Check:
- DNS records are correctly pointing to your server
- Firewall allows ports 80 and 443
- Nginx Proxy Manager is running:
docker ps
Security Considerations
- Keep your private keys secure: Never share or expose
/home/i2p/.reseed/contents - Regular updates: Keep system packages, Docker, and reseed-tools updated
- Monitor logs: Watch for suspicious access patterns
- Rate limiting: Consider implementing rate limiting to prevent abuse
- Firewall rules: Only expose necessary ports (80, 443, 81 for admin)
- Admin interface: Restrict Nginx Proxy Manager admin interface (port 81) to trusted IPs
Contributing to the Network
By running a reseed server, you’re providing critical infrastructure for the I2P network. Thank you for contributing to a more private and decentralized internet!
For questions or assistance, reach out to the I2P community:
- Forum: i2pforum.net
- IRC/Reddit: #i2p on various networks
- Development: i2pgit.org
Guide originally created by Stormy Cloud, adapted for I2P documentation.