The I2P project maintains official packages for Debian, Ubuntu, and their derivative distributions. This guide provides comprehensive instructions for installing I2P using our official repositories.
🚀 Beta: Automatic Installation (Experimental)
For advanced users who want a quick automated installation:
This one-liner will automatically detect your distribution and install I2P. Use with caution - review the installation script before running.
curl -fsSL https://i2p.net/installlinux.sh | sudo bash
What this does:
- Detects your Linux distribution (Ubuntu/Debian)
- Adds the appropriate I2P repository
- Installs GPG keys and required packages
- Installs I2P automatically
⚠️ This is a beta feature. If you prefer manual installation or want to understand each step, use the manual installation methods below.
Supported Platforms
The Debian packages are compatible with:
- Ubuntu 18.04 (Bionic) and newer
- Linux Mint 19 (Tara) and newer
- Debian Buster (10) and newer
- Knoppix
- Other Debian-based distributions (LMDE, ParrotOS, Kali Linux, etc.)
Supported architectures: amd64, i386, armhf, arm64, powerpc, ppc64el, s390x
The I2P packages may work on other Debian-based systems not explicitly listed above. If you encounter issues, please report them on our GitLab .
Installation Methods
Choose the installation method that matches your distribution:
- Option 1: Ubuntu and derivatives (Linux Mint, elementary OS, Pop!_OS, etc.)
- Option 2: Debian and Debian-based distributions (including LMDE, Kali, ParrotOS)
Ubuntu Installation
Ubuntu and its official derivatives (Linux Mint, elementary OS, Trisquel, etc.) can use the I2P PPA (Personal Package Archive) for easy installation and automatic updates.
Method 1: Command Line Installation (Recommended)
This is the fastest and most reliable method for installing I2P on Ubuntu-based systems.
Step 1: Add the I2P PPA
Open a terminal and run:
sudo apt-add-repository ppa:i2p-maintainers/i2p
This command adds the I2P PPA to /etc/apt/sources.list.d/ and automatically imports the GPG key that signs the repository. The GPG signature ensures packages haven’t been tampered with since they were built.
Step 2: Update the package list
Refresh your system’s package database to include the new PPA:
sudo apt-get update
This retrieves the latest package information from all enabled repositories, including the I2P PPA you just added.
Step 3: Install I2P
Now install I2P:
sudo apt-get install i2p
That’s it! Skip to the Post-Installation Configuration section to learn how to start and configure I2P.
Method 2: Using the Software Center GUI
If you prefer a graphical interface, you can add the PPA using Ubuntu’s Software Center.
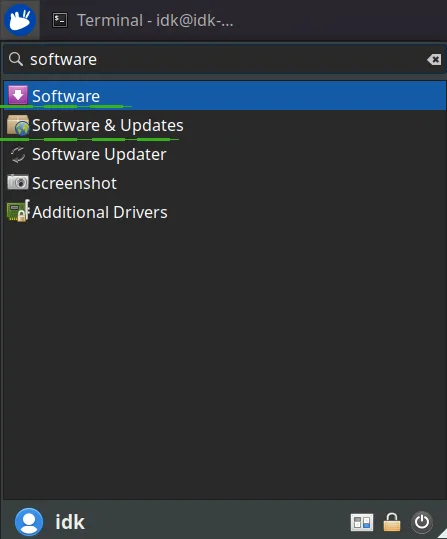
Step 1: Open Software and Updates
Launch “Software and Updates” from your applications menu.
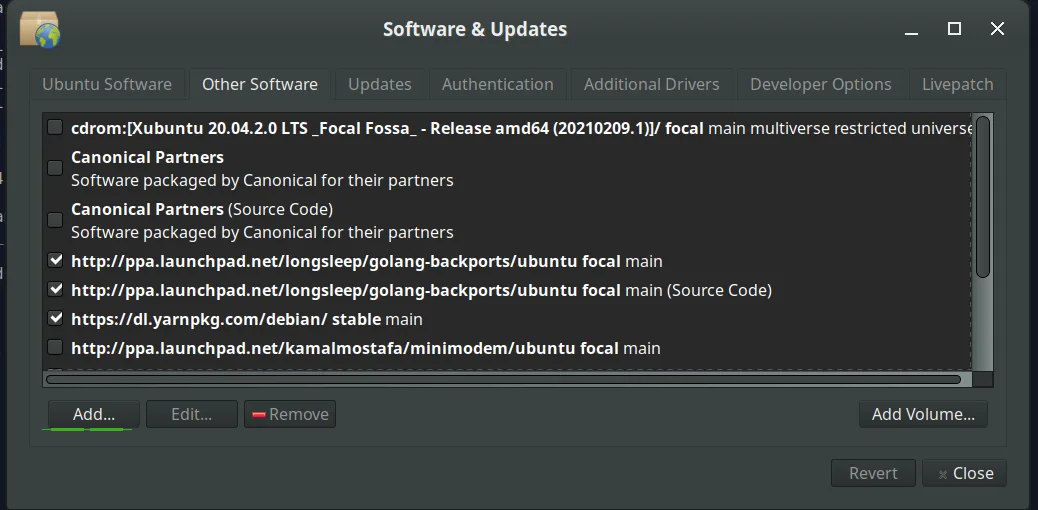
Step 2: Navigate to Other Software
Select the “Other Software” tab and click the “Add” button at the bottom to configure a new PPA.
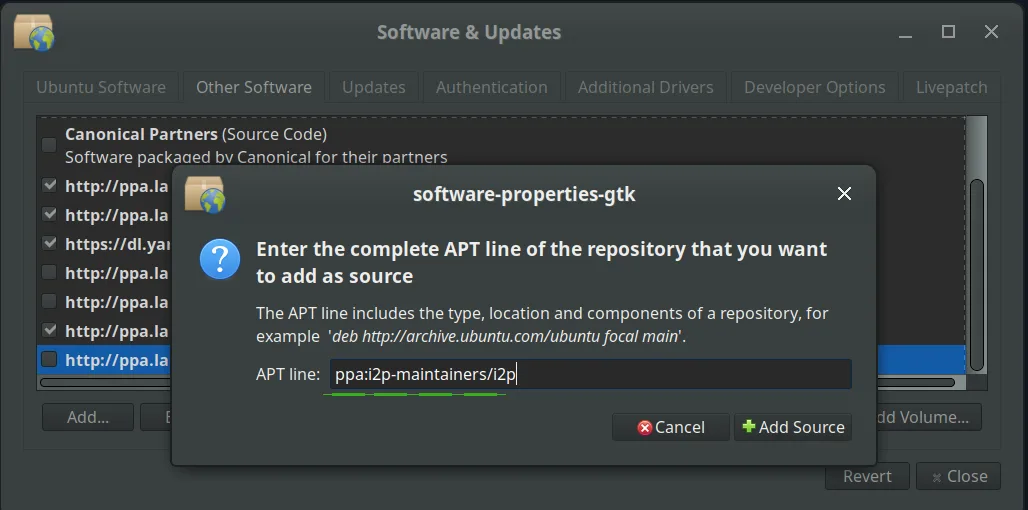
Step 3: Add the I2P PPA
In the PPA dialog box, enter:
ppa:i2p-maintainers/i2p
Step 4: Reload repository information
Click the “Reload” button to download the updated repository information.

Step 5: Install I2P
Open the “Software” application from your applications menu, search for “i2p”, and click Install.
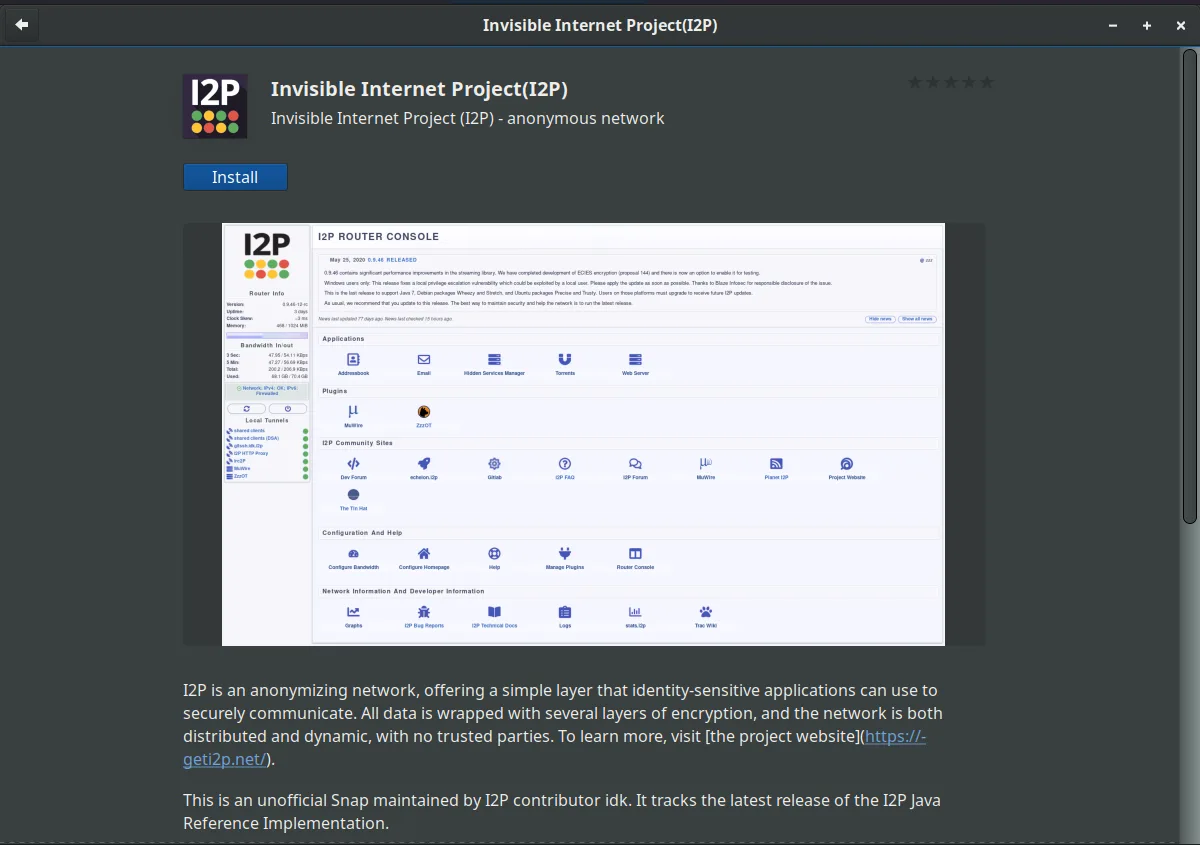
Once installation completes, proceed to Post-Installation Configuration .
Debian Installation
Debian and its downstream distributions (LMDE, Kali Linux, ParrotOS, Knoppix, etc.) should use the official I2P Debian repository at deb.i2p.net.
Important Notice
Our old repositories at deb.i2p2.de and deb.i2p2.no are end-of-life. If you’re using these legacy repositories, please follow the instructions below to migrate to the new repository at deb.i2p.net.
Prerequisites
All steps below require root access. Either switch to the root user with su, or prefix each command with sudo.
Installation Steps
Step 1: Install required packages
Ensure you have the necessary tools installed:
sudo apt-get update
sudo apt-get install apt-transport-https lsb-release curl
These packages enable secure HTTPS repository access, distribution detection, and file downloads.
Step 2: Add the I2P repository
The command you use depends on your Debian version. First, determine which version you’re running:
cat /etc/debian_version
Cross-reference this with the Debian release information to identify your distribution codename (e.g., Bookworm, Bullseye, Buster).
For Debian Bullseye (11) or newer:
echo "deb [signed-by=/usr/share/keyrings/i2p-archive-keyring.gpg] https://deb.i2p.net/ $(lsb_release -sc) main" \
  | sudo tee /etc/apt/sources.list.d/i2p.list
For Debian derivatives (LMDE, Kali, ParrotOS, etc.) on Bullseye-equivalent or newer:
echo "deb [signed-by=/usr/share/keyrings/i2p-archive-keyring.gpg] https://deb.i2p.net/ $(dpkg --status tzdata | grep Provides | cut -f2 -d'-') main" \
  | sudo tee /etc/apt/sources.list.d/i2p.list
For Debian Buster (10) or older:
echo "deb https://deb.i2p.net/ $(lsb_release -sc) main" \
  | sudo tee /etc/apt/sources.list.d/i2p.list
For Debian derivatives on Buster-equivalent or older:
echo "deb https://deb.i2p.net/ $(dpkg --status tzdata | grep Provides | cut -f2 -d'-') main" \
  | sudo tee /etc/apt/sources.list.d/i2p.list
Step 3: Download the repository signing key
curl -o i2p-archive-keyring.gpg https://geti2p.net/_static/i2p-archive-keyring.gpg
Step 4: Verify the key fingerprint
Before trusting the key, verify its fingerprint matches the official I2P signing key:
gpg --keyid-format long --import --import-options show-only --with-fingerprint i2p-archive-keyring.gpg
Verify the output shows this fingerprint:
7840 E761 0F28 B904 7535 49D7 67EC E560 5BCF 1346
⚠️ Do not proceed if the fingerprint doesn’t match. This could indicate a compromised download.
Step 5: Install the repository key
Copy the verified keyring to the system keyrings directory:
sudo cp i2p-archive-keyring.gpg /usr/share/keyrings
For Debian Buster or older only, you also need to create a symlink:
sudo ln -sf /usr/share/keyrings/i2p-archive-keyring.gpg /etc/apt/trusted.gpg.d/i2p-archive-keyring.gpg
Step 6: Update package lists
Refresh your system’s package database to include the I2P repository:
sudo apt-get update
Step 7: Install I2P
Install both the I2P router and the keyring package (which ensures you receive future key updates):
sudo apt-get install i2p i2p-keyring
Great! I2P is now installed. Continue to the Post-Installation Configuration section.
Post-Installation Configuration
After installing I2P, you’ll need to start the router and perform some initial configuration.
Starting I2P
The I2P packages provide three ways to run the I2P router:
Option 1: On-Demand (Basic)
Start I2P manually when needed using the i2prouter script:
i2prouter start
Important: Do not use sudo or run this as root! I2P should run as your regular user.
To stop I2P:
i2prouter stop
Option 2: On-Demand (Without Java Service Wrapper)
If you’re on a non-x86 system or the Java Service Wrapper doesn’t work on your platform, use:
i2prouter-nowrapper
Again, do not use sudo or run as root.
Option 3: System Service (Recommended)
For the best experience, configure I2P to start automatically when your system boots, even before login:
sudo dpkg-reconfigure i2p
This opens a configuration dialog. Select “Yes” to enable I2P as a system service.
This is the recommended method because:
- I2P starts automatically on boot
- Your router maintains better network integration
- You contribute to network stability
- I2P is available immediately when you need it
Initial Router Configuration
After starting I2P for the first time, it will take several minutes to integrate into the network. Meanwhile, configure these essential settings:
1. Configure NAT/Firewall
For optimal performance and network participation, forward the I2P ports through your NAT/firewall:
- Open the I2P Router Console
- Navigate to the Network Configuration page
- Note the port numbers listed (usually random ports between 9000-31000)
- Forward these UDP and TCP ports in your router/firewall
If you need help with port forwarding, portforward.com provides router-specific guides.
2. Adjust Bandwidth Settings
The default bandwidth settings are conservative. Adjust them based on your internet connection:
- Visit the Configuration page
- Find the bandwidth settings section
- The defaults are 96 KB/s download / 40 KB/s upload
- Increase these if you have faster internet (e.g., 250 KB/s down / 100 KB/s up for a typical broadband connection)
Note: Setting higher limits helps the network and improves your own performance.
3. Configure Your Browser
To access I2P sites (eepsites) and services, configure your browser to use I2P’s HTTP proxy:
See our Browser Configuration Guide for detailed setup instructions for Firefox, Chrome, and other browsers.
Troubleshooting
I2P won’t start
- Ensure you’re not running I2P as root:
ps aux | grep i2p - Check logs:
tail -f ~/.i2p/wrapper.log - Verify Java is installed:
java -version
Repository key errors
If you receive GPG key errors during installation:
- Re-download and verify the key fingerprint (Step 3-4 above)
- Ensure the keyring file has correct permissions:
sudo chmod 644 /usr/share/keyrings/i2p-archive-keyring.gpg
Updates aren’t working
If I2P isn’t receiving updates:
- Verify the repository is configured:
cat /etc/apt/sources.list.d/i2p.list - Update package lists:
sudo apt-get update - Check for I2P updates:
sudo apt-get upgrade
Migrating from old repositories
If you’re using the old deb.i2p2.de or deb.i2p2.no repositories:
- Remove the old repository:
sudo rm /etc/apt/sources.list.d/i2p.list - Follow the Debian Installation steps above
- Update:
sudo apt-get update && sudo apt-get install i2p i2p-keyring
Next Steps
Now that I2P is installed and running:
- Configure your browser to access I2P sites
- Explore the I2P router console to monitor your router
- Learn about I2P applications you can use
- Read about how I2P works to understand the network
Welcome to the Invisible Internet!